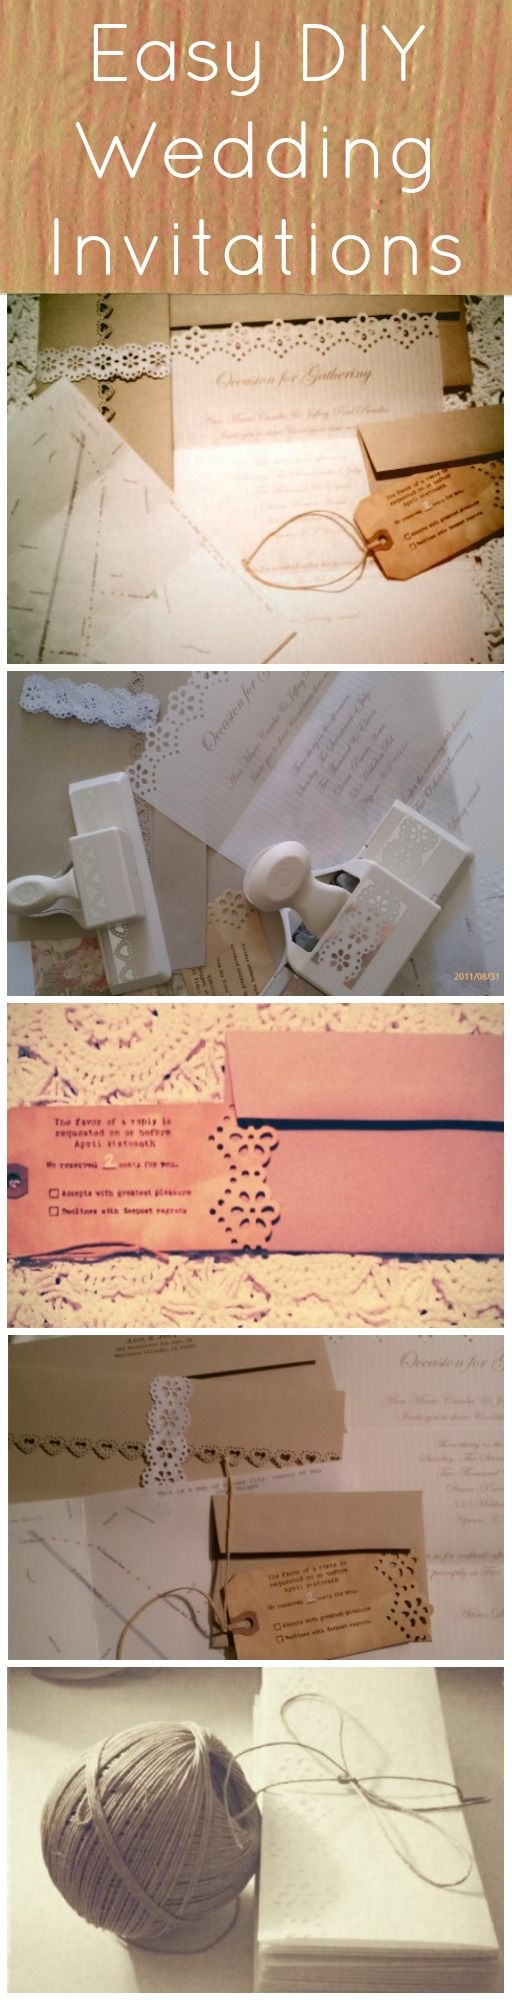
This DIY wedding invitation has become one of most popular post ever on Rustic Wedding Chic. This crafty bride came up with her own DIY wedding style and then completed the look by creating her own rustic wedding invitation. Recently a bride emailed me her DIY vintage inspired wedding invitation and I knew I had to share it with the rest of the Rustic Wedding Chic community. For all you DIY fans start taking notes because I guarantee you will want to make your own invitations after seeing this! The bride even gives us the inspiration behind this design and the materials used to create this look. If you love this look make sure you check out our entire rustic wedding DIY project section and start getting crafty today.

The Inspiration:
The design of our invitation is very simple and i wanted to have that vintage feel…because that’s the theme of our wedding. The color i chose are earth tones which became the color palette of our wedding with some hint of pastel to add some girlieness.
The Materials:
I used our home printer to print the invitations and maps/directions on vellum papers. I used recycled taupe brown fiber paper for the pocketfold, recycled taupe brown envelops for the outer(biggest envelope) and RSVP envelopes. I used 5-1/4×2-5/8 manila tags as the RSVP card. To get that vintage price tag look, i soaked the tags overnight in a bowl with 5 tea bags then i laid them out to dry. Then i used martha stewart Craft punchers to design the edges of the invitation, RSVP card, and pocketfold.
I ordered custom rubber stamps from froyoo through Etsy for the return address and RSVP.


Looking for a rustic wedding invitation – See all of our Country Rustic Wedding Invitation
61 Comments
Vivian
November 25, 2013 at 9:25 pmHello! Thank you for the great idea. I just bought two punchers from Martha steward, but which one did you use for the vellum paper. I got the two shown in your picture but there seems to but a third one used. The big puncher shown in your picture was used to make the strip and the small one was the heart. But which one did you use on the actually invite. I tried using the big puncher on the vellum and it was not correct. It seems to only punch strips and not edges.
4 Things to DIY & 4 Things Best Left to the Professionals » Rebecca Mackesty Photography
May 20, 2013 at 3:06 pm[…] invitations printed in a hard-to-read font, when you can make your own invitations instead? DIY invitations are more personal, casual, and generally far less expensive than paying someone else to do it. […]
Friday Fun | imperfectlypoised
April 26, 2013 at 7:25 am[…] {via} […]
Jennifer
March 3, 2013 at 3:24 amI wasn’t even going to DO invites – and now I am so inspired by these that I just ordered tons of paper/envelope samples from Papersandmore.com. Thanks for sharing!
Ann
March 28, 2013 at 1:15 pmHi Jennifer! Sorry for the late reply, but i am so glad that i was able to inspire you! 🙂
Take care and congrats!!
Ann
Jenny
February 27, 2013 at 7:01 pmThank you so much for the detailed instructions! I am collecting all the stuff now to make them these are perfect four a country/vintage wedding! I love them and am so excited about them!
Ann
March 28, 2013 at 1:16 pmHi Jenny,
I am excited for you too!Enjoy making the invites! Congrats on your up coming wedding!
xoxo,
Ann
doria
January 26, 2013 at 10:52 amLOVELY IDEA:) In what print did you address the invite envelopes? Did you print them off the envelopes with the computer also? THANKS!!!
Ann
February 1, 2013 at 5:47 pmHi Doria,
All of our invites were hand written by me 🙂 but you can definitely use the printer. I used Edwardian Script font for the invites.
Ann
Daisy Bueno
January 15, 2013 at 4:53 pmHi, love this idea! Im currently working on some invitations for my sisters sweet fifteen and I like the stamp idea for the RSVP cards! What size did you get your stamp?
Ann
February 1, 2013 at 5:49 pmHi Daisy,
The stamp is 3.5×2.5, landscape. 🙂
Ann
Nancy
January 9, 2013 at 1:34 pmwhat an amazing job you did!! What font did you use on the actual invitation?
Tabby
January 7, 2013 at 5:53 pmDear Ann:
I have been reading through the rustic chic blog at all the comments you responded to, so I think I have a pretty good understanding of how you made these. I was wondering if you had other pictures that you would be able to send me of the invitations, like individual pictures. I love the look of these, and our whole wedding is going to be DIY so I am truly wanting to make my invitations. Thank you so much for your time!
-Tabby
Holly Schepke
December 18, 2012 at 11:53 amHi there, about how much did this cost you to make them??
Thanks!
joanne
October 1, 2012 at 11:13 amhi ur idea is great.. i love to make my wedding invitation on my own but i tried searching int he internet for punchers but its not here in philippines. do you have any idea where can i get it and wont cost too much for shipping?
Ann
October 2, 2012 at 5:13 pmHi Joanne,
Try the link below for Etsy. The shipping cost is $10. Not sure if that is still too much. Try searching other brands of design punchers that are less pricey than the Martha Stewart ones.
Pleease let me know if you have other questions. You can email me at anncamba@yahoo.com
Thanks! Ann
http://www.etsy.com/listing/110051657/martha-stewart-doily-lace-border-paper?ref=sr_gallery_4&ga_includes%5B%5D=tags&ga_search_query=martha+stewart+punch&ga_search_type=all&ga_view_type=gallery
Ann
July 10, 2012 at 5:12 pmHi! This is Ann and I would like to say sorry for the late response. If you have any questions and need additional pictures, please email me at anncamba@yahoo.com.
Thank you so much for liking my DIY wedding invitation!
Ann
Rochele
June 1, 2012 at 9:33 amI’m so sorry I have a couple more questions. Did you have problems with the reinforcements coming off of the shipping tags after tea dying them? Also what type and color ink pad did you use for the RSVP stamp? Thank you!
Ann
July 10, 2012 at 5:07 pmHi again! Yes, they were coming off, but the string helped the reinforcements stay in place. I used the acid free Distress Ink in vintage photo.
Thanks!
Ann
Rochele
May 30, 2012 at 9:38 amThis may be a silly question but how did you know who the RSVP response was from, were the names written anywhere, or did you put their return address on the envelope that was coming back to you with the response.
Ann
July 10, 2012 at 5:05 pmHi Rochelle,
Sorry for the late response. What I did was I wrote small numbers on the back of the RSVP card/manila tags in pencil and I kept a notebook where I wrote the names that corresponds to the number. Hope this helps. Please let me know if you have any more questions.
Thanks!
Ann
Mel
May 23, 2012 at 11:16 pmHello!
I’m in love with these…!
I was wondering if you had any trouble punching through the manila tags. For some reason mine just wont cut through them…
Any suggestions?
Thank you!
Ann
July 10, 2012 at 5:03 pmHi Mel,
Sorry for the super late response. I took my time and punch the manila tags one at a time. If you’re having trouble, it might be the puncher. I had trouble with one of my punchers, so I went back to Micheal’s and exchanged it. Let me know if you have any more questions.
Thanks!
Ann
Tracy
May 21, 2012 at 8:07 pmSo you used 2 different doile design punches correct? One for the doile “strip” and the other is for the edging? I love these!! Just want to make sure I buy the correct product. Thank you!
Ann
July 10, 2012 at 5:01 pmHi Tracy,
Sorry for the super late response. Yes, i used 2 kinds of punchers. If you buy the Martha Stewart brand, the box has pictures of the finished product. Let me know if you have anymore questions.
Thanks!
Ann
Vintage Invitation How To
May 21, 2012 at 6:14 am[…] that send them. I came across this DIY invitation and could not resist sharing it. Well done at Rustic Wedding Chic. Source: Rustic Wedding […]
Danielle
May 15, 2012 at 1:48 pmI love these invitations as well and I had another question to add. By the way the previous question and answers have been super helpful. I am a little confused about the pocket fold. I purchased samples of the A7 cascade recycled taupe pocket folder from paperandmore.com and I’m assuming this is completely different than the pocket fold you used. How does the invitation assemble with just a tri-fold piece of paper as your pocketfold, where is the pocket? Could you post an additional picture to demonstrated how the invitation is assembled? Thanks in advance!
Ann
July 10, 2012 at 4:59 pmHi Danielle,
So sorry for the super late response. I just evenly folded the paper three times. First I placed the invitation, then the RSVP card and envelope on top of the invitation, then the map. It also depends how big your map’s going to be or if you will include a map. I will take some pics this week.
Thanks!
Ann
Jenny
March 2, 2013 at 10:42 amSo is there not an actual pocket with the paper that you used for the pocketfold? Which paper at paper and more did you use for this? Do you have any pics of the pocketfold open?
Thank you so much!
Jennifer
April 18, 2012 at 9:31 amI can’t find the RSVP stamp anywhere! Help please! I would love to make these invitations!
Maggie Lord
April 18, 2012 at 10:27 amTry: http://www.etsy.com/search?includes%5B%5D=tags&q=rsvp+stamp
Ann
May 1, 2012 at 2:53 pmHi! Here’s the link to the Etsy vendor i ordered the stamp from.
http://www.etsy.com/shop/foryoo
Below are the details of the custom RSVP stamp i ordered.
RSVP 3.5×2.5, page-layout: landscape, typewriter font
Sorry for the late reply.
Ann
Annie
March 27, 2012 at 10:46 amHi! I love love love your invites 🙂 When you ordered the envelopes, what size did you order? When looking on paperandmore.com I noticed that it has “A1 (4 Bar), A2, A6, A7, A9, #10, 6 1/2″ Square” below it. Which one of the links did you use?
Ann
March 29, 2012 at 12:02 pmHi Annie! I used the #10 recycled taupe brown fiber envelope for the outer envelope (the biggest envelope that held everything) and I used 4 bar taupe brown fiber recycled 3 5/8 x 5 1/8 for the RSVP envelope.
http://www.paperandmore.com/products/envelopes/recycled/no10_taupe_brown_fiber.html
Glad you ‘love’ my invites!
Ann
Jolene
March 23, 2012 at 10:27 pmI love these invites! Did you purchase the invitation paper from Paperandmore.com? I can’t seem to find it. What kind of paper is it? Does it have a name? Thanks for your help!
Jolene
Ann
March 26, 2012 at 10:23 amHi Jolene! yes, i ordered it from paperandmore.com. First, I ordered the vellum paper sample packs to see which paper will work for me. I really liked White Columns 28# , so I ordered 1 pack (100 sheets). It’s only $18.99 and anything over $15, you only pay $3.99 shipping.
Ann
Halle
March 22, 2012 at 5:39 pmDo you know the names of the martha punches you bought? I really like the one you used for the top and bottom of your invitations and save the date card.
Ann
March 23, 2012 at 10:23 amHi Halle! It’s the Martha Stewart Deep Edge Punches, Flower Bed.
http://www.amazon.com/Martha-Stewart-Crafts-Punch-Flower/dp/B003D7X298
Thanks!
Ann
Kelly
March 5, 2012 at 4:46 pmI was able to make the rsvp cards for about approx. $40.00. I found the “tags” at office max 100 of them for $4.99 I had the tea bags and the martha stewart paper cutter was on sale at Joann for 10 dollars I also ordered the envelopes for the 100 invitations for $12.00 the stamp was about $25.00
Ann
March 21, 2012 at 9:12 am=) tha’s awesome, Kelly! I would love to see your finish product!!
Ann
Tina
March 3, 2012 at 4:46 pmWow!! This is so creative. If you don’t mind me asking, would this end up being a good option for someone looking to do invites on a budget?
Ann
March 21, 2012 at 9:11 amHi Tina! Yes, I saved a couple of $$ for doing my own invites. You can also shop around for custom made invites and compare.
Some of the materials like punchers, I bought them at Michaels and when you sign up you will get emails with discounts. I used the punchers to design some of my props and on our ceremony programs, so it was worth it.
kelly
March 2, 2012 at 2:47 pmThat would be great i am having a hard time finding the right stamp 🙂
Ann
March 21, 2012 at 9:19 amHI! I’m not sure if you still need the sizes, but here they are…
RSVP 3.5×2.5, page-layout: landscape, typewriter font
Return Address 2.5×1.75, page-layout: ladscape, typewriter font
I also had a return address custom stamp made, and I still use it for all of my mails!
Ann
kelly
March 1, 2012 at 11:19 amHow did u print on the tags?
Ann
March 1, 2012 at 1:05 pmHi Kelly! I ordered a custom rubber stamp through Etsy. Let me know if you will do the same and I can give you the size of the stamp so that it fits perfectly in the tags.
Thanks!
Heather
February 23, 2012 at 6:56 pmI love the invites. I am doing a test run on the reply cards as I type. How long did you let them soak in the water with the tea bags?
Ann
March 1, 2012 at 1:03 pmHi Heather! I soaked them over night and laid them on paper towels to dry =)
Elizabeth Libra
February 20, 2012 at 12:13 pmHow did you print on the tags? This is all just beautiful!
Ann
March 1, 2012 at 1:01 pmHi Elizabeth! I ordered a customized stamped through Etsy.
Thank you!
Ann
February 7, 2012 at 5:16 pmHi Rochele and thank you! Yes, I used Martha Stewart’s punchers…the doily design…once you’re done punching, they separate from the whole sheet of paper. I used white craft papers, they’re wide so I was able to make 10-12 strips.
Janet
October 20, 2013 at 9:12 pmWhat did you use to keep the strips together? Did you just glue them?
Rochele
January 29, 2012 at 10:34 amDid you use the craft punchers for the thing that goes around the pocket fold? I love these by the way they are so simple yet elegant.
rachel
January 20, 2012 at 1:28 pmis this printed on a full page or just half? trying to figure out how much paper we would need. THanks!
Ann
February 7, 2012 at 5:12 pmHi Rachel! The invitations are full page…the driving directions are half page.
danielle
January 13, 2012 at 5:05 pmI loveeee this! I am making invitations now, and am so inspired by your design! What is a pocketfold and how do I make one?
Ann
January 18, 2012 at 9:19 amHi Danielle! Glad i am able to inspire other brides. A pocket fold is where the invitation, RSVP card and envelope, and map were tucked in then inserted in the biggest/outer envelope. It’s just a recycled paper folded into three parts…if you look at the very 1st picture with heart edges…that’s the pocket fold. Very simple and fun! Let me know if you have other questions!
jacqui
November 17, 2011 at 6:25 pmlooks wonderful but where did she go to purchase the paper and envelopes?! i’ve been looking everywhere!!!
Ann
January 6, 2012 at 2:55 pmHi! Sorry for the super late reply, but I ordered the papers and envelopes from paperandmore.com.
Michelle
November 8, 2011 at 4:46 pmWere you able to use a printer on the tags? I really love love love love this idea….just wish I was a little more crafty! Looks so good! I might have to give it a try!
Maggie Lord
November 8, 2011 at 8:27 pmyes, she just used a printer!