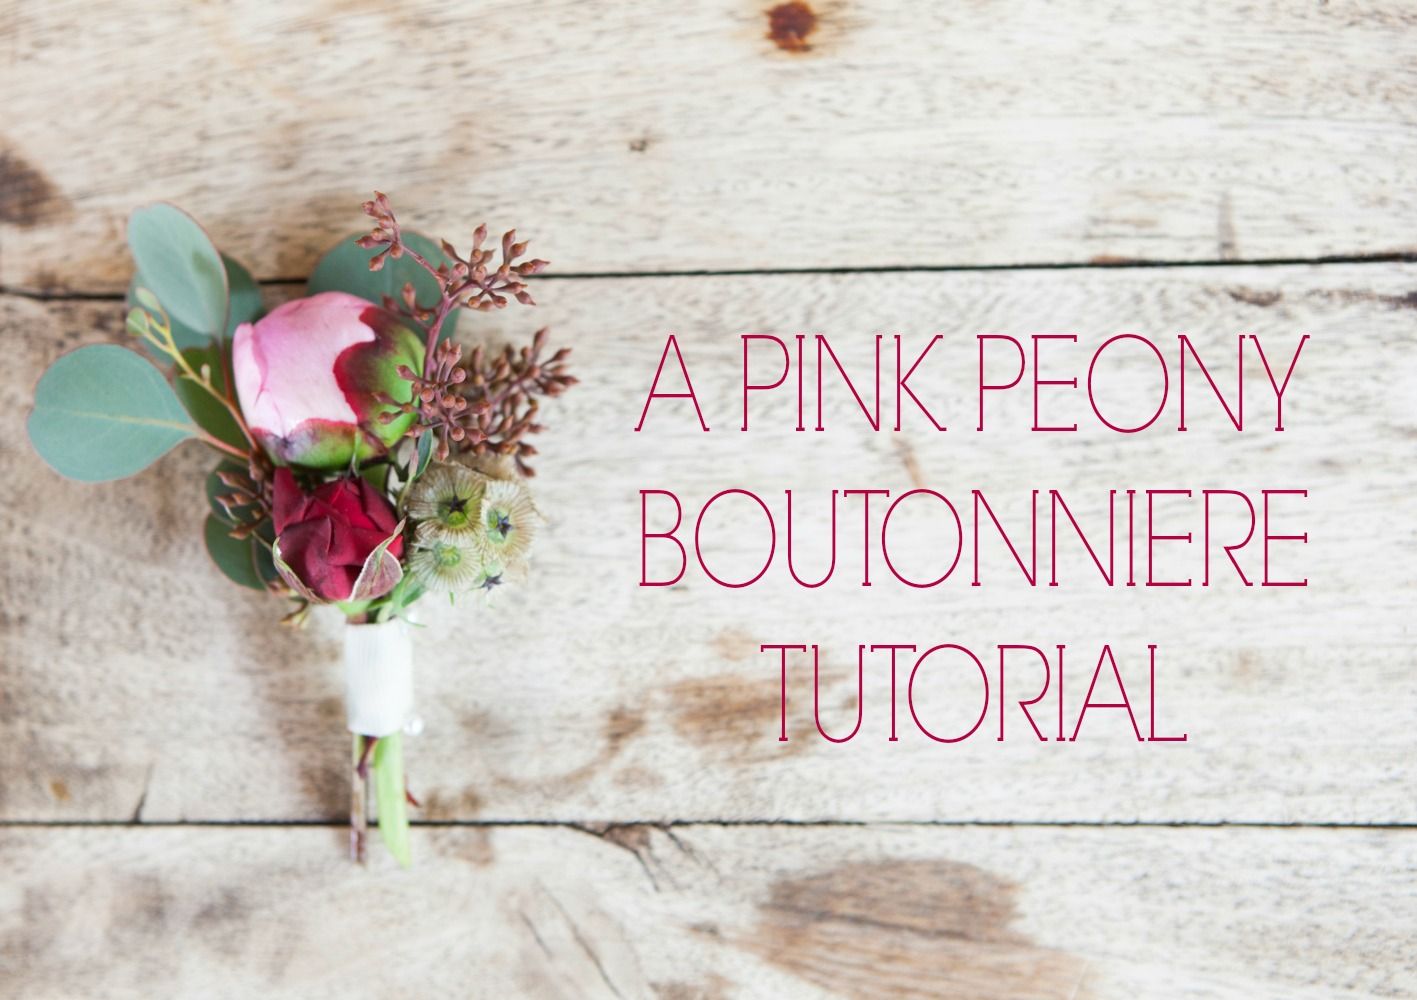
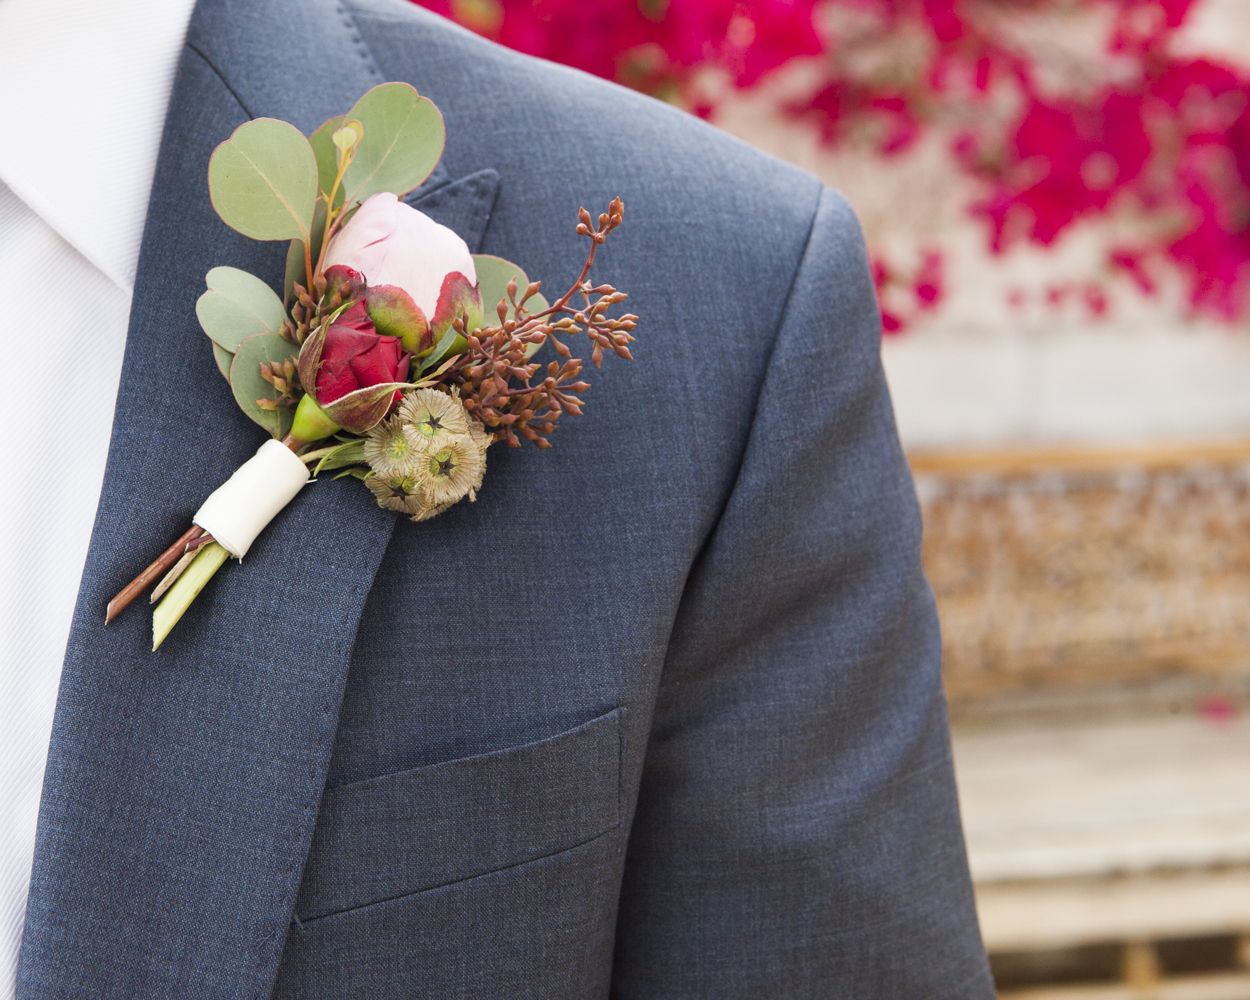
 We love pink peonies more than basically anything here at Rustic Wedding Chic. And who ever said they had to be just for the girls?? We have never seen a pink peony boutonniere so we decided to make one ourselves. We absolutely love the look of this one against his navy jacket. It is a perfect rustic choice for a boutonniere, with the bare stems and muted greens. You could also of course do this with a white peony and white spray rose buds instead if your man isn’t into the idea of pink. Either way, we are obsessed with the result and are so excited to share it with you! This style boutonniere would look great alongside a bare stem bouquet. Learn how to make a perfect bare stem bouquet here! Happy pinning!
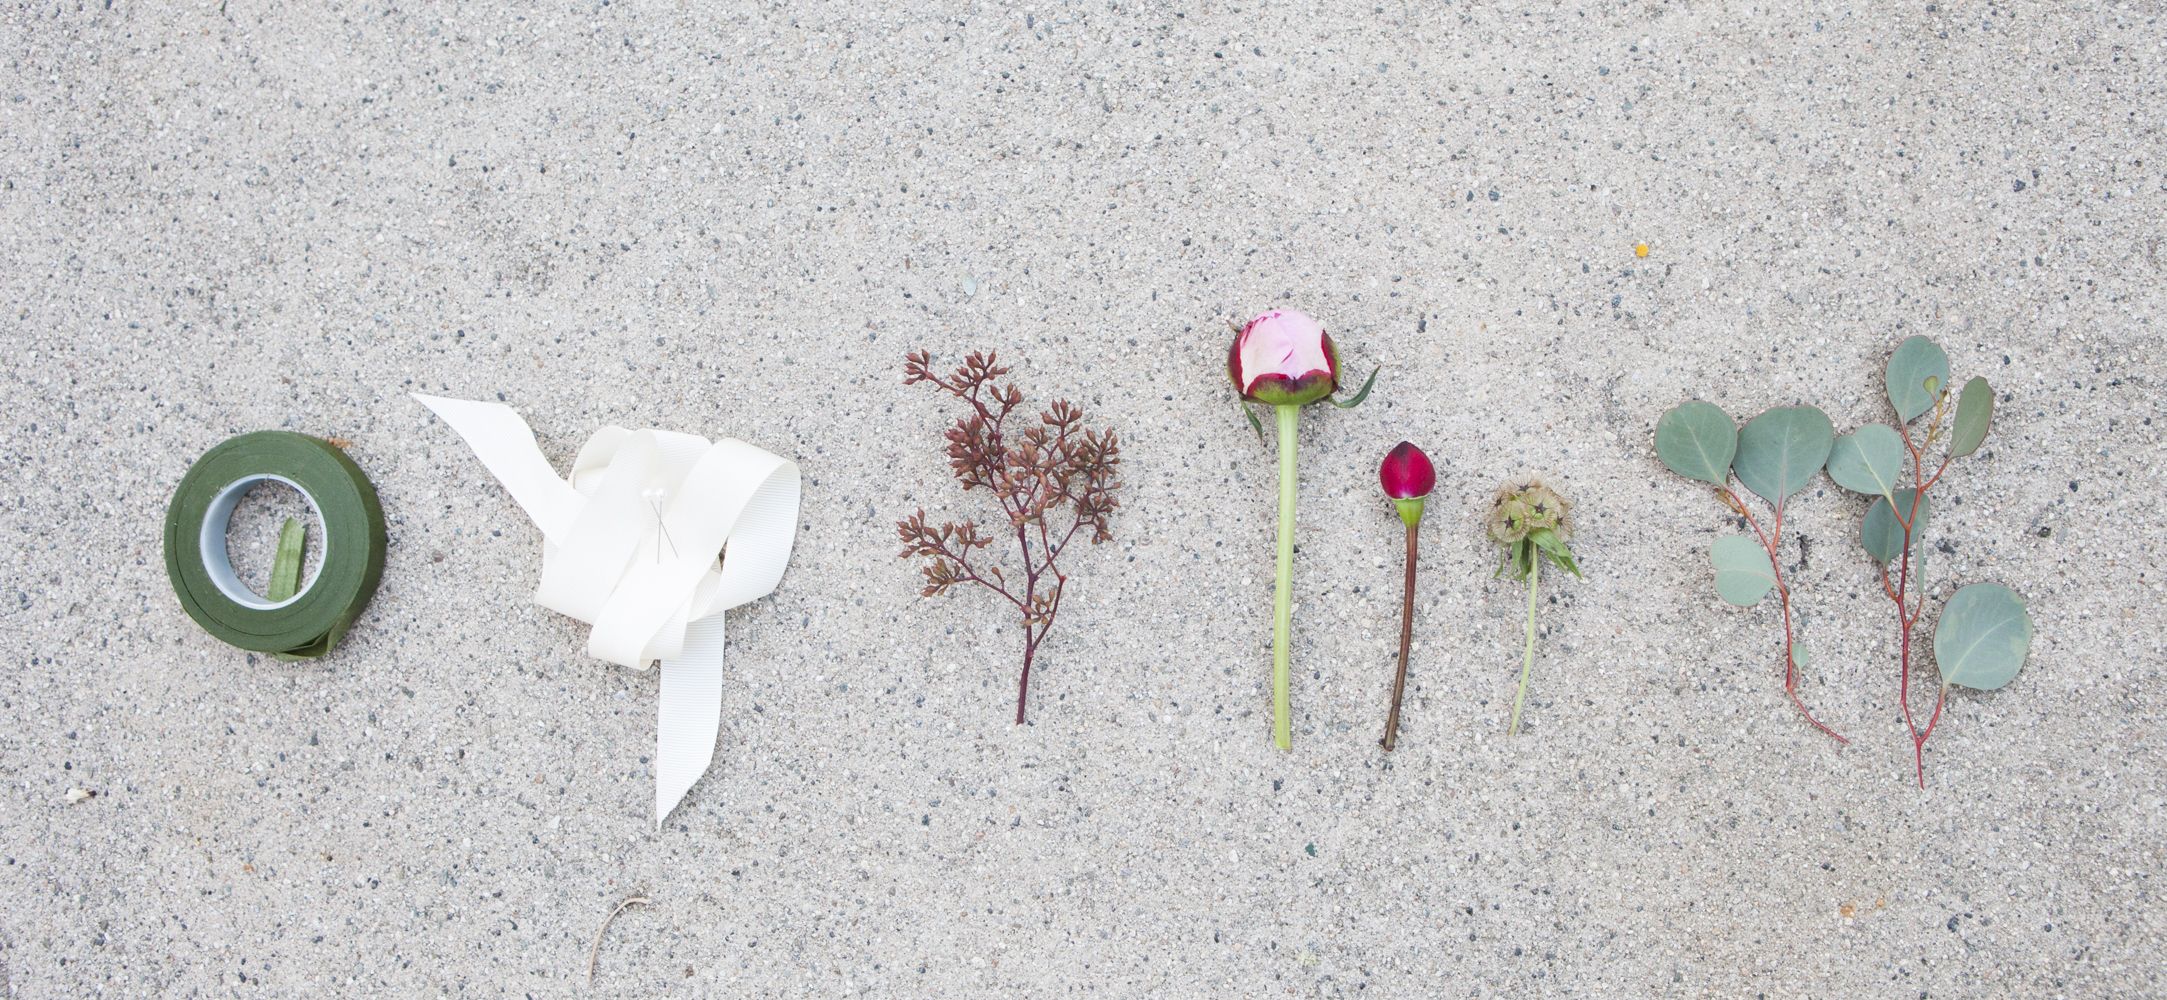
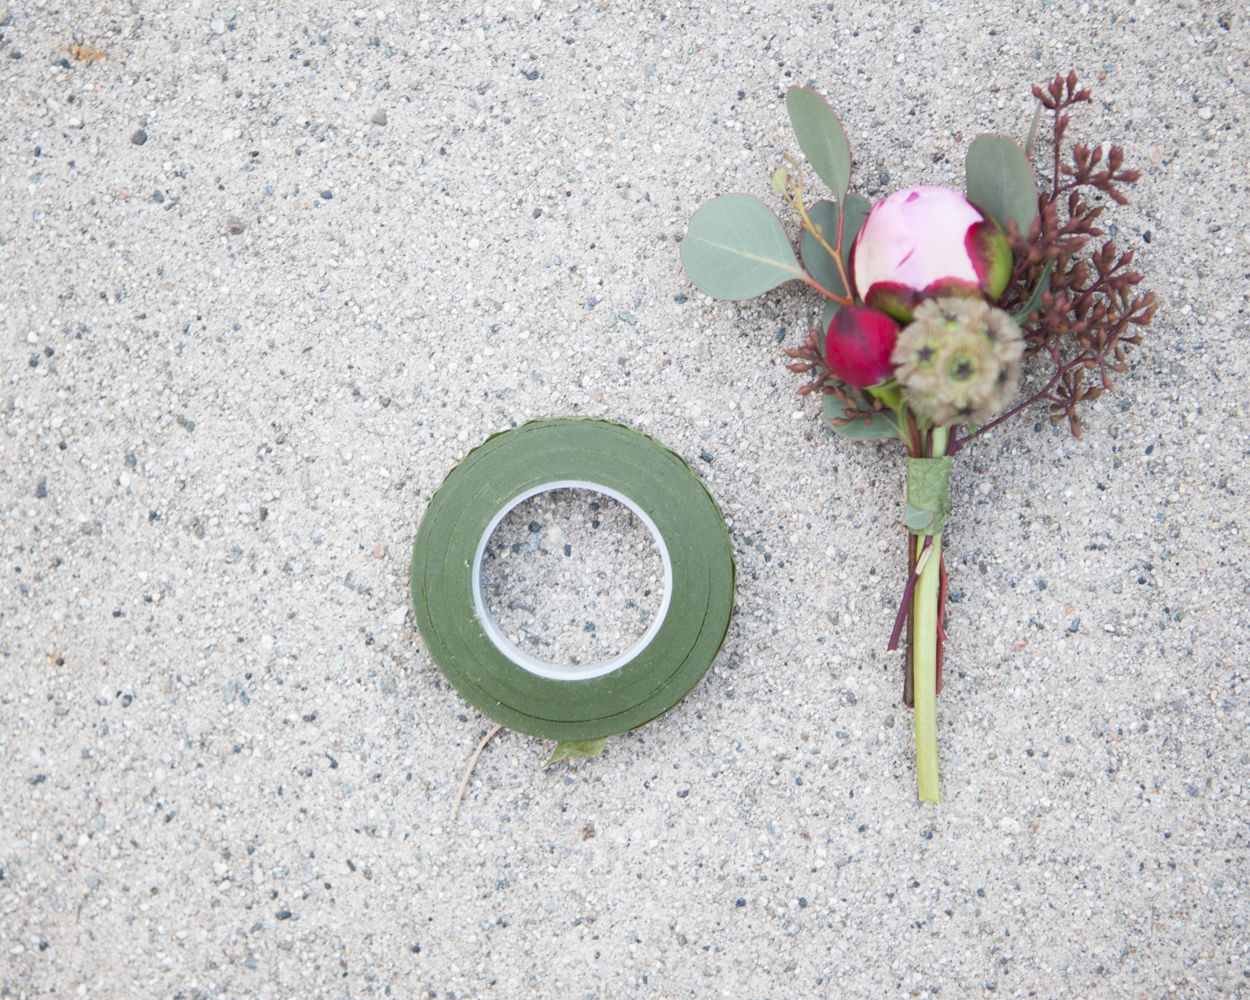
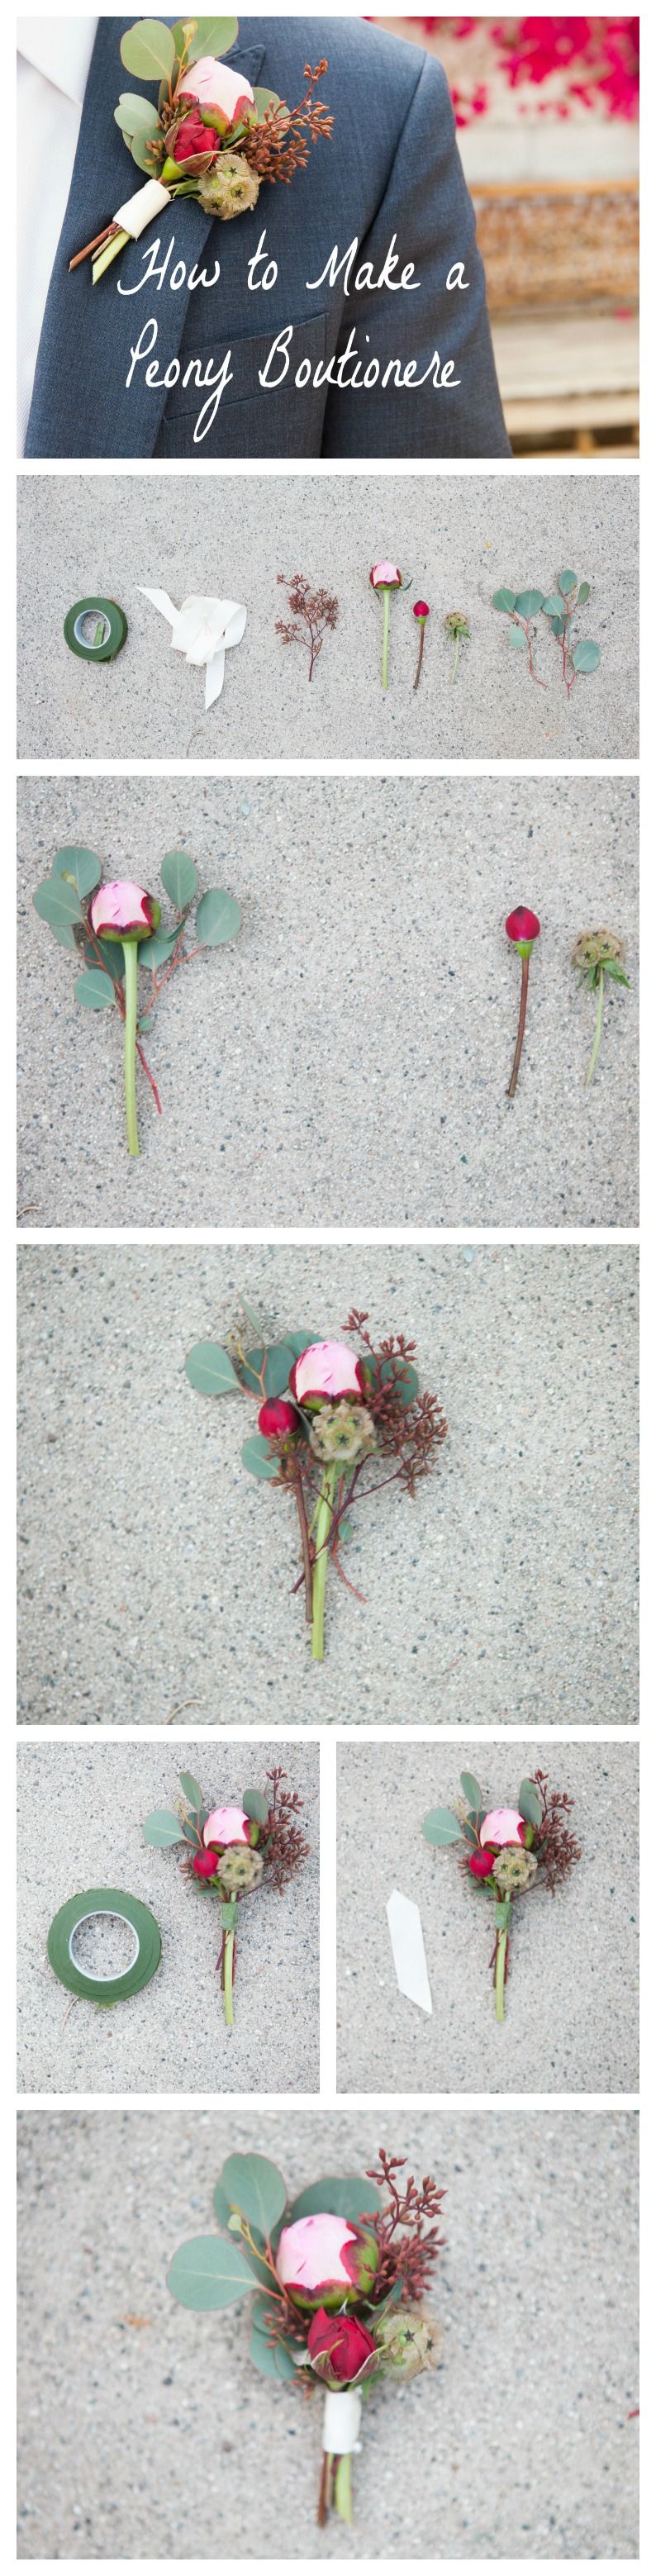
What You’ll Need : Floral Tape / Ribbon / Pins / Eucalyptus Berries / Pink Peony Bud / Rosebud / Seed Pod / Eucalyptus Stems
First, make sure your stems are trimmed and clean. Create a nest of eucalyptus or whatever green you are using and nestle the peony bud in the leaves. Work on a flat surface so that you know the boutonniere will lay flat. Keep your peony in the fridge until you are ready to work with it, and try to work in a cool place, as the heat causes them to pop right open and you don’t want that to happen until you’re ready. The tighter the bud the better for this reason, unless you are wanting a big blossom, in which case, find a larger, softer bud to work with.
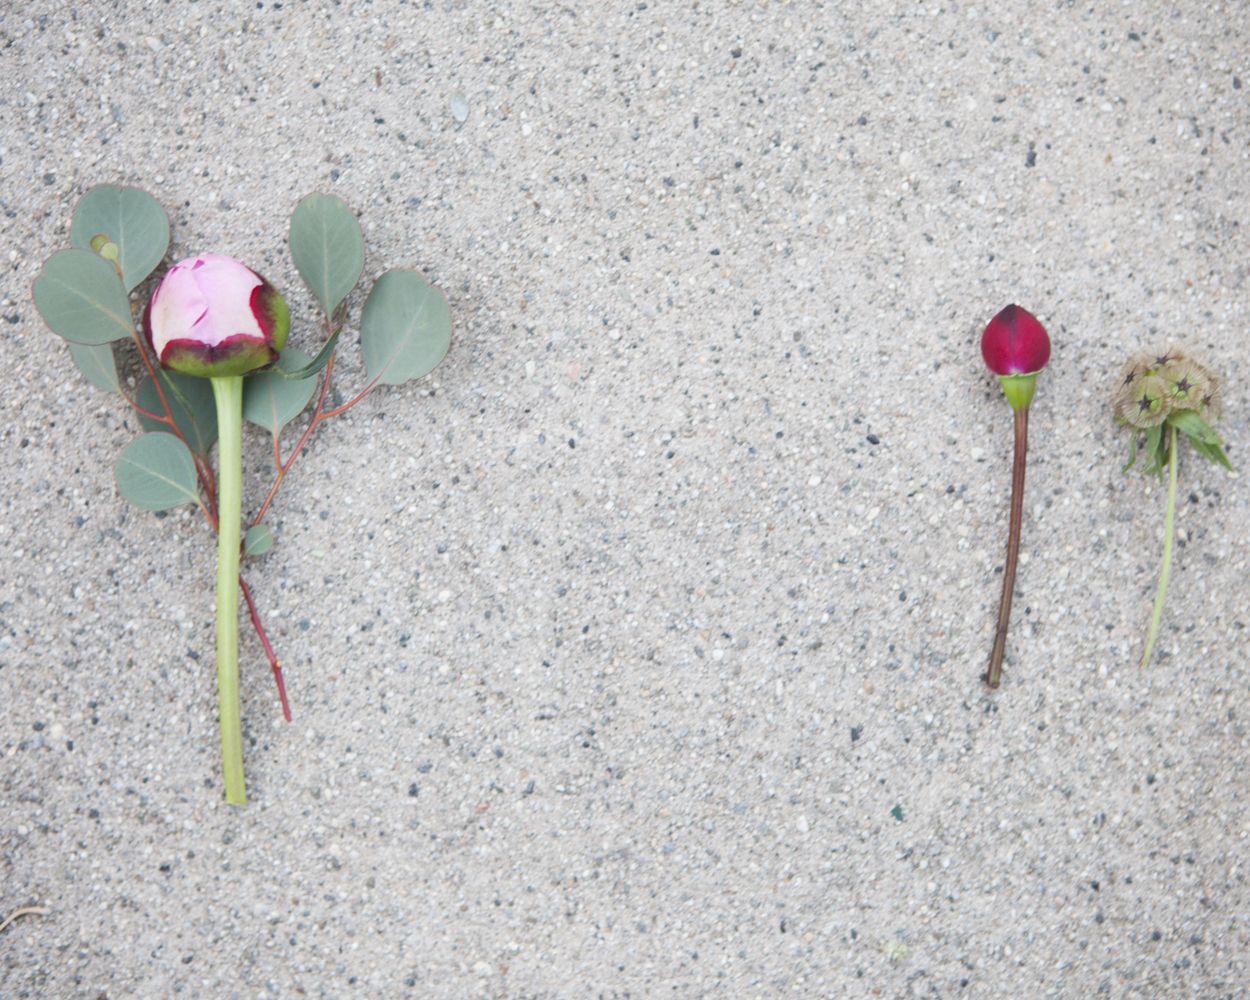
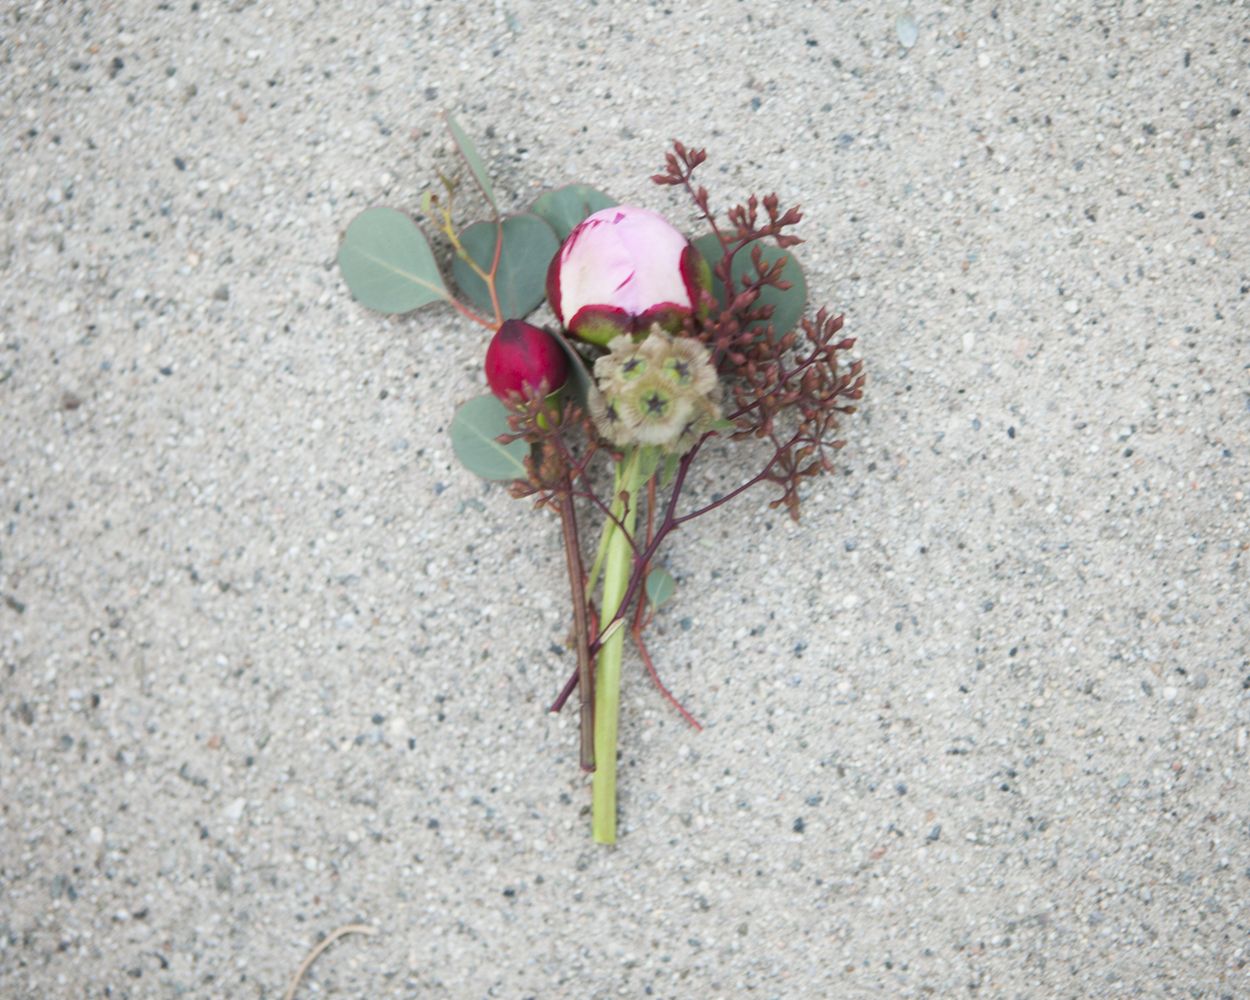
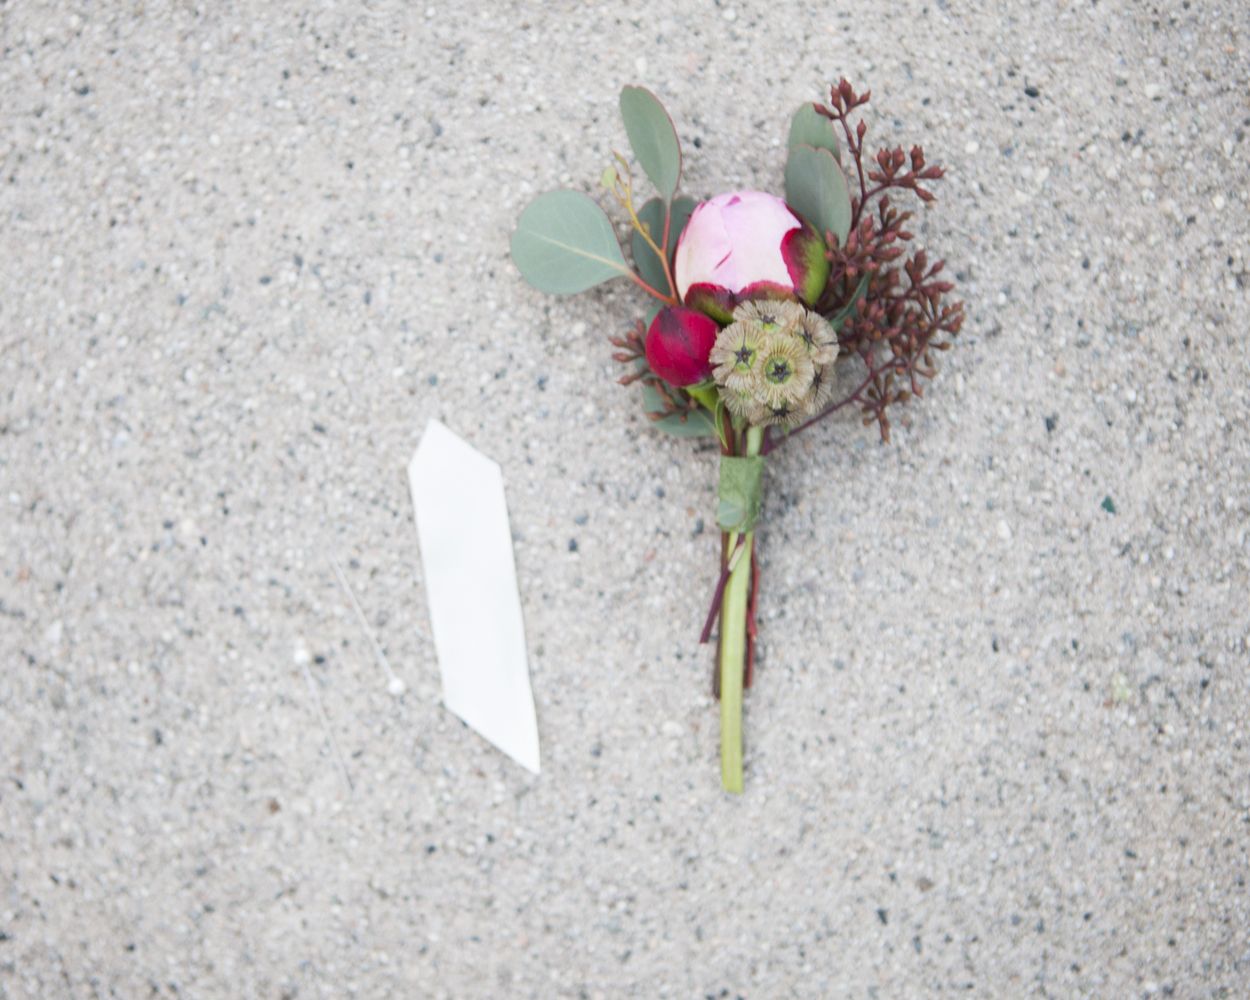
Compose the boutonniere by nestling in the rosebud and the seed pod and berries so that it looks full and balanced. You may need to add or trim until you get it just right.
Pinch the stems together with one hand and with the other, wrap the stems tightly at the base of the buds with floral tape.
Then, take a few inches of ribbon and trim the ends so that you have clean edges. Trim the ends to the correct length and the place the boutonniere in fresh water. Store in the fridge until you are ready for the final steps just before the wedding!
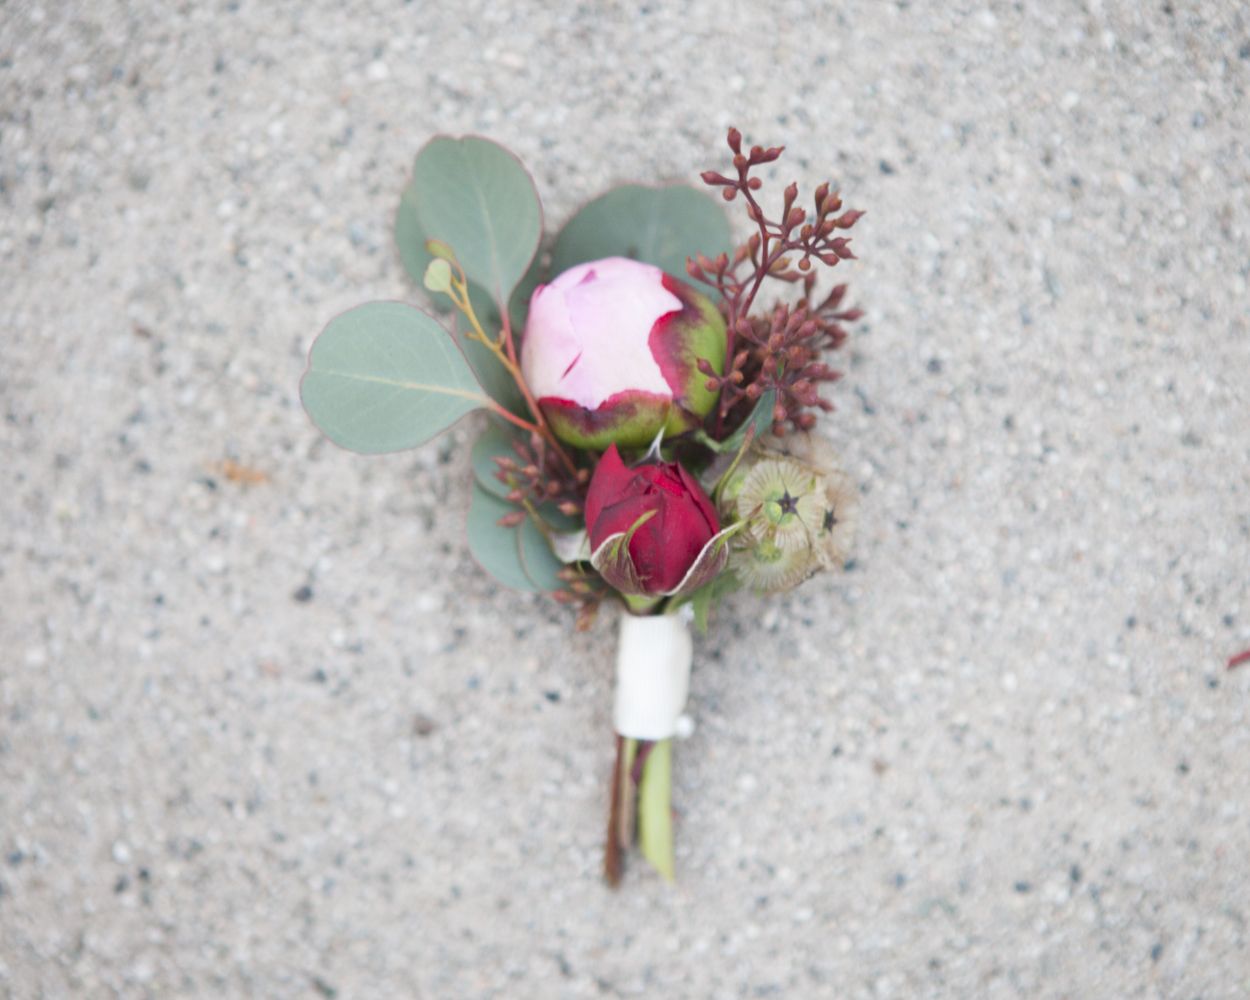
Pat the stems dry and wrap the stem with ribbon, covering over the floral tape and pin the ribbon in place. Fold the end of the ribbon over on itself to keep the raw edge of the ribbon from showing. For safety, sink the pins into the peony stem at slight angles up and down so that the ends of the pins aren’t sticking out at dangerous angles!
Making sure that the stems are dry, pin to the grooms jacket and you’re all done! If you want the bud to open, remove the green petals from the outside of the peony bud, pinching them off at the base. The bud will pop open quickly! Or leave it as a bud like we did!
Photography : MCR PROJECTS
Step By Step :
No Comments