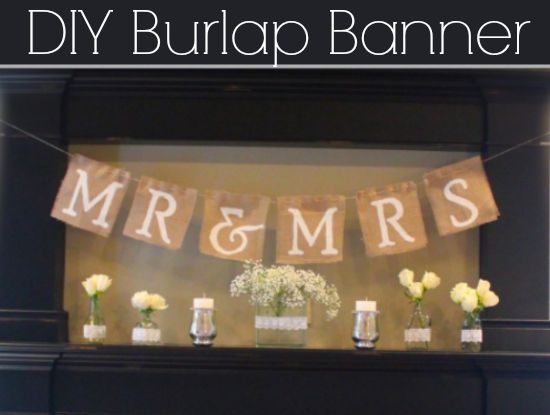
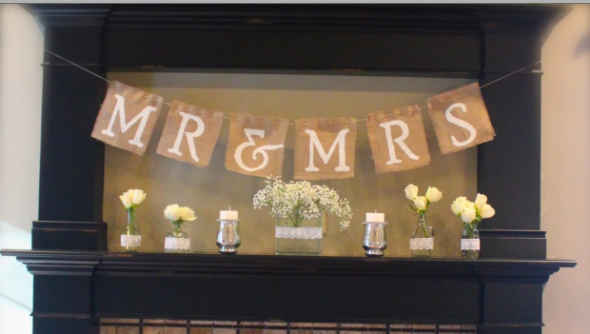
One of the biggest rustic wedding trends out there right now is the burlap banner. I have seen couples hang Mr. & Mrs. Buralp Banners, Welcome Burlap Banner and of course, the very popular Just Married Burlap Banner. Since these buralp wedding details are so popular I thought a great way to start your weekend would be with a fun how to project. This DIY project comes to us today from Rachael over at Nerdy & Hip a fun blog and shop that I know all you rustic brides will want to check out.
So if you are ready to take on this rustic DIY idea than get your materials ready and start working!

Materials Needed:
1 yd. of Burlap Fabric
12 ft. (minimum) of Twine
Acrylic White Paint
Paintbrush
Scissors
Printer & Printer Paper for letters
X-ACTO knife

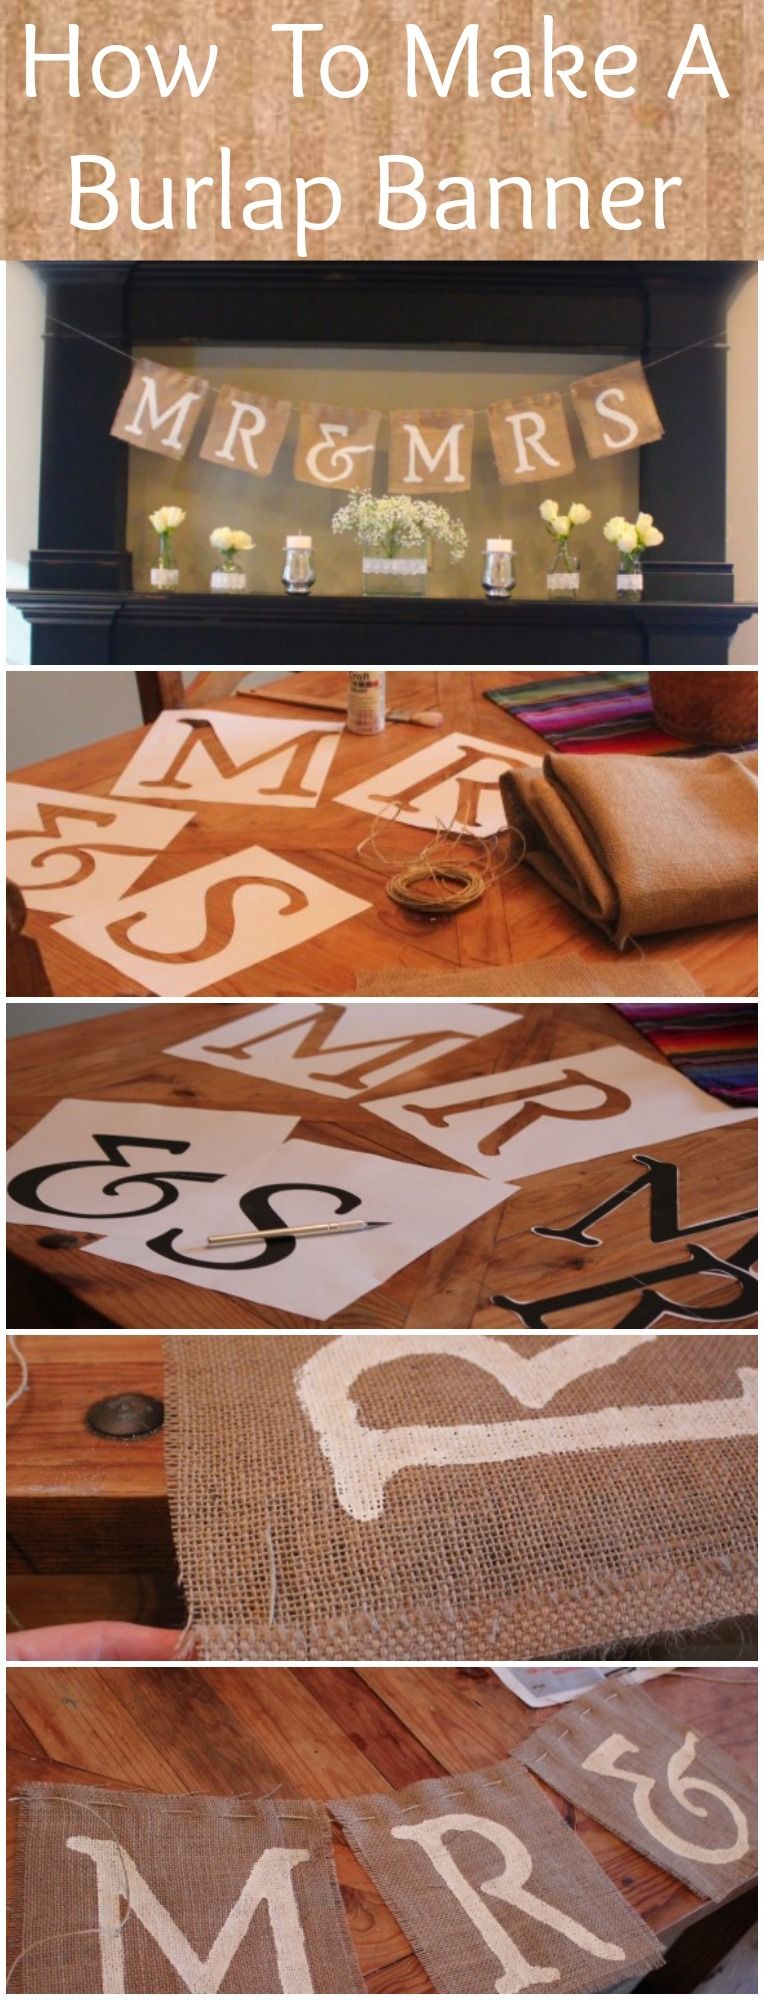
First, you need letters, I opted to print out some large letters and played around for awhile until I found the right font, which, for me was Poor Richard. All the letters you need for this Mr. & Mrs. project, are M, R, S and the & symbol. I reused the M and R twice, but you could get these extras if you prefer to not to reuse them. Using an X-ACTO knife, I cut out the letters.
My husband and I are going to be eating our wedding dinner at a six-foot-long table, and my plan is to have the banner hanging in front, so I ended up cutting my burlap squares about 10 x 10. For this Mr. & Mrs. sign, you will need 6 squares. Feel free to adjust the size for your own banner! Also, I used the standard/natural burlap, but I am SO loving white burlap these days, and would encourage experimentation with other shades of this natural material as well!

I ironed out the 10 x 10 squares, using my iron with heavy steam, but this burlap has many creases that would likely only come out after a washing, drying, and additional ironing, which I am just not committing to for this project.

Once the letters were on the burlap, I used tape to secure the paper on two sides (I could only find scotch, but would have preferred to use masking… the scotch worked out just fine, though!) I used a white acrylic paint to paint the letters on. I was generous with the amount of paint, because I really wanted it to show up and be solid and bright. As I mentioned, I used the M and the R twice, carefully removing the paper and repositioning it on the second pieces of burlap before painting them. I waited only about 30 minutes before I got started attaching the twine. The paint was still slightly wet, but I was careful (and anxious to finish the project!).


I had a good amount of twine (maybe 12 feet?) to start, and I began by inserting the twine upward through the burlap about 1 inch from the top of the square. I weaved the twine into the burlap at about 1 inch intervals. Occasionally, the piece of twine would lose it’s ‘sharpness’ at the end, making it difficult to get through the burlap. I would then snip it on an angle to make it easy to insert into the burlap again. I had to do this about 10 times during the weaving process. I shimmied the letters down the twine carefully as I attached additional squares.

Lastly, I took out a few of the strands of burlap from the bottom and sides, creating a more unfinished edge. I ensured that there were about 3 feet of remaining twine at either side of the banner so that I can easily secure it to our wedding table (and later on, to our bedroom wall, for honeymooner décor) and trimmed off the rest. …And then the Burlap Banner lived happily ever after…

…And for those of you who may not be so inclined to make your own Burlap Banner, you can buy this sign from Nerdy & Hip! Contact them for pricing and details here!

All photos & descriptions of this how to project are courtesy of Nerdy & Hip and can not be reproduced without permission
3 Comments
Rustic Wedding Crafts | Pencils and Pancakes
June 25, 2013 at 7:47 pm[…] This tutorial was so easy!!! And that’s saying something…I usually mess things up. […]
Logan
March 12, 2013 at 11:55 amHi!
I love this font! What size was the font for this project? I am having difficulty getting the right size stencils for a similar project. Thank you!
Bellenza Wedding Bistro
November 3, 2012 at 6:27 amLove the handmade “imperfections”…they add even more charm to this rustic banner! 🙂